Create Impressive Restaurant-Style Desserts in Your Own Kitchen
Transform your home kitchen into a fine dining establishment with these professional techniques for creating show-stopping desserts. Master the art of the perfect molten chocolate lava cake and impress your guests with restaurant-quality presentation.
Understanding the Magic of Molten Centers
The secret to achieving that perfect molten center lies in understanding the science behind chocolate lava cakes. When you learn how to cook these elegant desserts, you're essentially creating a controlled underbaking process. The outer layer sets while the interior remains gloriously liquid, creating that signature flow when you cut into the cake.
Temperature control is absolutely crucial. Your oven must be preheated to exactly 425°F (220°C). Too hot, and the entire cake will set; too cool, and you'll end up with an undercooked mess. Professional pastry chefs use oven thermometers to ensure accuracy, and this small investment will dramatically improve your results.
The batter consistency matters tremendously. When properly mixed, it should be smooth and glossy, similar to how to make pancakes batter but richer and more luxurious. Overmixing develops gluten and creates a tough texture, while undermixing leaves lumps. Fold your ingredients gently but thoroughly, ensuring the chocolate is completely incorporated without overworking the mixture.
Timing is everything in this delicate dance. Individual ramekins typically require 12-14 minutes of baking time, but this can vary based on your oven and the size of your molds. The edges should be set and slightly pulling away from the sides, while the center remains soft to the touch. Learning to recognize this perfect moment comes with practice, much like mastering how to boil eggs to your preferred doneness.
Essential Ingredients and Equipment
Quality chocolate makes all the difference. Choose a high-quality dark chocolate with 60-70% cocoa content for the classic version. The chocolate should be smooth, glossy, and free from any waxy coating. Avoid chocolate chips, as they contain stabilizers that prevent proper melting. Instead, use bar chocolate chopped into small, uniform pieces for even melting.
Butter should be unsalted and European-style if possible, with a higher fat content that creates a richer, more velvety texture. Room temperature eggs incorporate more easily and create better structure. Fresh eggs are essential, just as they are when you learn how to make an omelet or how to make scrambled eggs for breakfast dishes.
Your ramekins are critical to success. Standard 6-ounce ramekins work perfectly for individual servings. They must be thoroughly buttered and dusted with cocoa powder to ensure easy release. This preparation step is non-negotiable – skip it, and your beautiful dessert will stick stubbornly to the sides, ruining the presentation when you attempt to unmold it.
A double boiler setup ensures gentle, even melting of your chocolate and butter mixture. If you don't have a dedicated double boiler, create one by placing a heatproof bowl over a saucepan of simmering water. The bowl should not touch the water, and the heat should be gentle – aggressive heat can cause chocolate to seize and become grainy.
Step-by-Step Preparation Technique
Begin by preparing your ramekins meticulously. Use soft butter at room temperature and apply it generously to every surface, including the rim. Dust with cocoa powder, tapping out any excess. This creates a non-stick barrier and adds an extra layer of chocolate flavor. Place the prepared ramekins on a baking sheet for easy handling.
Melt your chocolate and butter together in the double boiler, stirring occasionally until completely smooth. Remove from heat and let it cool slightly – you want it warm but not hot when you add the eggs. This temperature control prevents the eggs from cooking prematurely, similar to the careful temperature management required when learning how to cook scrambled eggs properly.
Whisk your eggs and sugar together vigorously until the mixture becomes pale and slightly thickened. This incorporates air and creates structure. The sugar should be completely dissolved, and the mixture should fall in ribbons from the whisk. This process typically takes 3-4 minutes of continuous whisking.
Fold the chocolate mixture into the egg mixture gently but thoroughly. Use a rubber spatula and employ a folding motion – cutting down through the center, sweeping along the bottom, and bringing the spatula up along the side. Rotate the bowl as you work. Add the flour last, folding just until no streaks remain. The batter should be glossy and smooth.
Divide the batter evenly among your prepared ramekins, filling them about three-quarters full. A small ladle or measuring cup helps ensure equal portions. Tap each ramekin gently on the counter to release any air bubbles. At this point, you can refrigerate them for up to 24 hours, making this an excellent make-ahead dessert option.
Perfect Baking Times and Temperature Control
Preheat your oven to 425°F (220°C) and allow it to fully come to temperature. Place your baking sheet with the ramekins on the center rack for even heat distribution. Set your timer for 12 minutes initially. At this point, check the cakes – the edges should be set and pulling away slightly from the sides, while the center should still jiggle when gently shaken.
If the centers are still very liquid, give them another 1-2 minutes. Remember that they will continue cooking slightly from residual heat after removal from the oven. It's better to slightly underbake than overbake – you can always return an underdone cake to the oven, but you cannot rescue an overbaked one.
For refrigerated batter, add 2-3 minutes to the baking time. The cold batter needs extra time to heat through while still achieving that molten center. This flexibility makes these desserts perfect for entertaining – prepare them in advance and bake while you're enjoying dinner, timing them to be ready just as you clear the main course.
Different oven types may require slight adjustments. Convection ovens circulate air more efficiently and may cook faster – reduce the temperature by 25°F and check a minute or two earlier. Gas ovens can have hot spots, so rotating the baking sheet halfway through cooking ensures even results, similar to how you might rotate a pan when learning how to cook bacon evenly.
Restaurant-Quality Presentation Tips
Presentation transforms a good dessert into an unforgettable experience. Let the cakes rest for exactly one minute after removing from the oven. This brief pause allows the structure to set slightly, making unmolding easier while keeping the center perfectly molten. Run a thin knife around the edge of each ramekin to loosen any stuck spots.
Place your serving plate upside down over the ramekin, then quickly but carefully invert both together. Give a gentle shake if needed, and the cake should release cleanly. The cocoa-dusted exterior creates a beautiful matte finish that contrasts elegantly with glossy chocolate sauce or fresh berries.
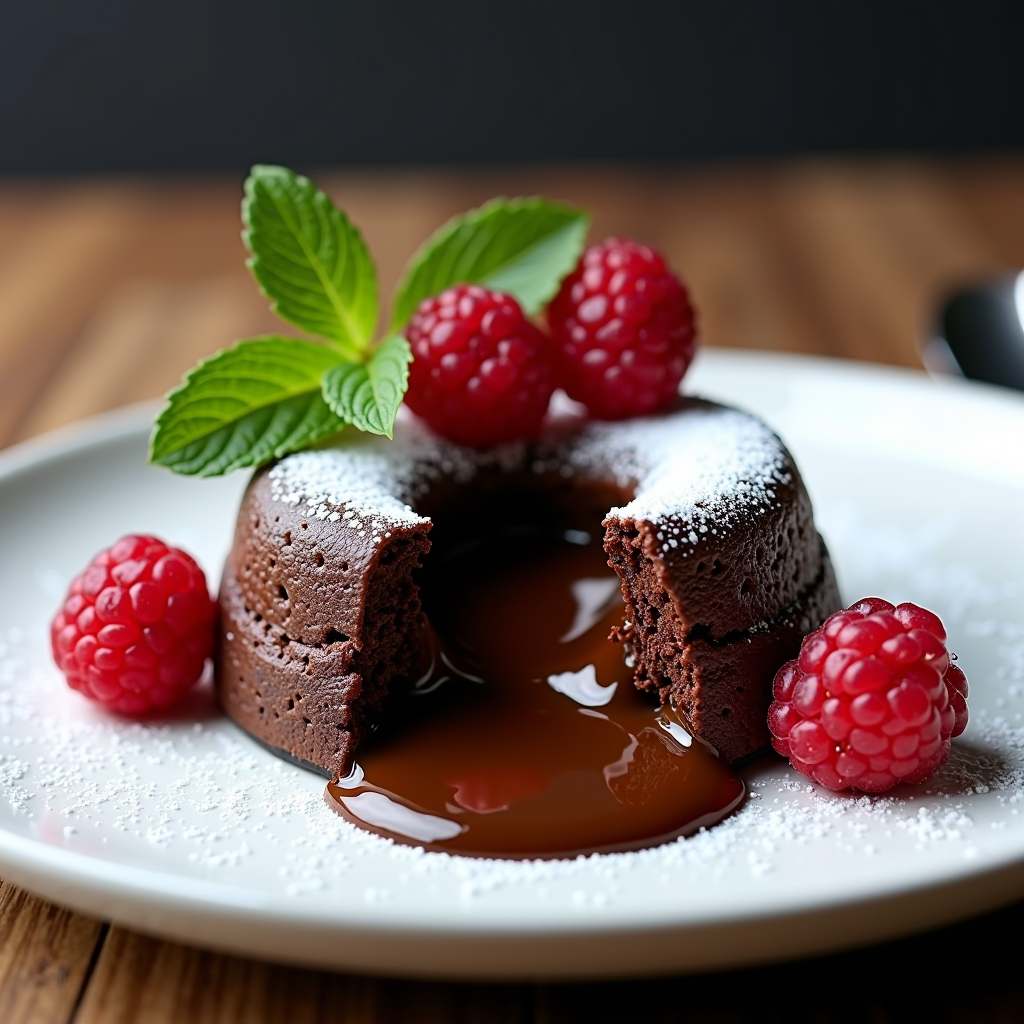
Dust with powdered sugar just before serving using a fine-mesh sieve. Create patterns by placing a doily or stencil over the cake before dusting. Fresh berries – raspberries, strawberries, or blackberries – add color and a tart contrast to the rich chocolate. A small sprig of fresh mint provides a pop of green and aromatic freshness.
Consider plating sauces artistically. A simple raspberry coulis can be drizzled in elegant patterns or pooled beneath the cake. Vanilla bean crème anglaise creates beautiful contrast when drizzled around the plate's edge. Use a squeeze bottle for precise control, or practice your wrist technique for free-form artistic drizzles.
Serve immediately while the center is still molten. Instruct your guests to cut into the center with their fork to release the flowing chocolate – this moment of revelation is part of the dessert's magic. The contrast between the set exterior and liquid interior creates an unforgettable textural experience.
Delicious Variations and Flavor Additions
White chocolate creates an elegant variation with a sweeter, creamier profile. Use the same technique but reduce baking time by 1-2 minutes, as white chocolate sets more quickly than dark. The pale color creates a stunning canvas for colorful berry sauces and makes an impressive presentation.
Espresso powder enhances chocolate's depth without adding coffee flavor. Add one tablespoon to your batter for a more complex, sophisticated taste. For true coffee lovers, increase to two tablespoons and serve with a coffee-flavored whipped cream. This combination rivals any dessert you'd find in a high-end restaurant.
Orange zest brings bright, citrus notes that cut through chocolate's richness beautifully. Add the finely grated zest of one orange to your batter, being careful to avoid the bitter white pith. A splash of Grand Marnier or Cointreau in the batter amplifies this flavor profile for adult gatherings.
Peppermint extract creates a festive variation perfect for winter holidays. Add half a teaspoon to the batter and garnish with crushed candy canes or peppermint bark. The cool mint flavor provides refreshing contrast to warm, rich chocolate, making it surprisingly light despite its decadent appearance.
Salted caramel centers offer an indulgent twist. Place a spoonful of thick caramel sauce in the center of each ramekin before adding the batter. As the cake bakes, the caramel warms and mingles with the molten chocolate, creating a complex, multi-layered flavor experience. Finish with flaky sea salt for sophisticated contrast.
Make-Ahead Instructions for Stress-Free Entertaining
The beauty of molten chocolate cakes lies in their make-ahead flexibility. Prepare the batter and fill the ramekins up to 24 hours in advance. Cover each ramekin tightly with plastic wrap and refrigerate. This advance preparation allows you to focus on other aspects of your meal, much like how planning helps when you learn how to make lasagna or other complex dishes.
When ready to bake, remove the ramekins from the refrigerator while your oven preheats. Letting them sit at room temperature for 10-15 minutes helps ensure even baking. Remember to add those extra 2-3 minutes to the baking time to account for the chilled batter. This timing works perfectly – start baking as you serve the main course, and they'll be ready for dessert.
You can also freeze unbaked cakes for up to one month. Wrap each ramekin in plastic wrap, then aluminum foil, and freeze. When ready to use, bake directly from frozen, adding 5-7 minutes to the standard baking time. This option provides ultimate flexibility for spontaneous entertaining or busy schedules.
Prepare your garnishes in advance as well. Wash and dry berries, store them in the refrigerator. Make raspberry coulis or chocolate sauce ahead and gently rewarm before serving. Whipped cream can be prepared several hours ahead and kept chilled. Having everything ready ensures smooth, stress-free service when your guests are ready for dessert.
Troubleshooting Common Issues
If your cakes are completely set with no molten center, you've overbaked them. Reduce baking time by one minute next attempt. Remember that ovens vary, and you may need to adjust the standard recipe timing to suit your specific equipment. Keep detailed notes on what works in your kitchen.
Cakes that won't release from ramekins indicate insufficient greasing. Be generous with butter, ensuring complete coverage of all surfaces. The cocoa powder dusting isn't just for flavor – it creates a barrier that prevents sticking. Don't skip this crucial step, even if you're using non-stick ramekins.
Grainy or seized chocolate results from water contact or overheating. Ensure all equipment is completely dry before melting chocolate. Keep the heat gentle and stir frequently. If chocolate does seize, sometimes adding a tablespoon of warm cream and stirring vigorously can save it, though prevention is always better than cure.
Sunken centers after baking indicate undermixing or insufficient structure. Ensure eggs and sugar are whisked until pale and thick before adding chocolate. The mixture should fall in ribbons from the whisk. Proper incorporation of air creates the structure needed to support the molten center while maintaining the set exterior.
"Mastering restaurant-quality desserts at home is about understanding technique, not following recipes blindly. Once you grasp the principles behind molten centers, proper baking times, and elegant presentation, you can create impressive desserts that rival any fine dining establishment. The confidence you gain from perfecting these skills extends to all areas of cooking, from learning how to cook rice perfectly to mastering how to make pizza from scratch."
With these detailed instructions and professional techniques, you're equipped to create stunning molten chocolate lava cakes that will impress even the most discerning guests. The combination of proper preparation, precise timing, and artistic presentation transforms simple ingredients into an unforgettable dessert experience. Practice these methods, experiment with the variations, and soon you'll be creating restaurant-quality desserts with confidence and ease.
Remember that cooking is as much about the journey as the destination. Each attempt teaches you something new about your oven, your ingredients, and your technique. Keep notes, adjust as needed, and don't be discouraged by initial imperfections. Even professional pastry chefs spent years perfecting their craft. Your home kitchen can produce results that rival any restaurant when you apply these principles with patience and attention to detail.